
Understanding Roof Flashing: What Is It and How Does It Work
Any experienced roofing company in Charlotte will tell you that roof flashing is one of the most important parts of your home's protection system. This guide explains what roof flashing is, why it matters, and how it keeps your home dry. We'll cover the different types of flashing, how they get installed, warning signs of problems, and simple maintenance tips. Understanding these basics helps you make smart decisions about your roof's health and longevity.
Importance of Roof Flashing
Roof flashing serves a vital role in keeping water out of your home and protecting your building's structure. This key part of your roof system redirects water away from vulnerable areas, such as roof joints, valleys, chimneys, skylights, and dormers. By creating a tight seal between roofing materials and other parts of your home, flashing stops leaks and water damage. Good flashing also protects against mold, rot, and other moisture problems that can hurt your building's lifespan. Regular checks and care of roof flashing ensure it functions properly, protecting your building from water infiltration and preserving your home's overall health.
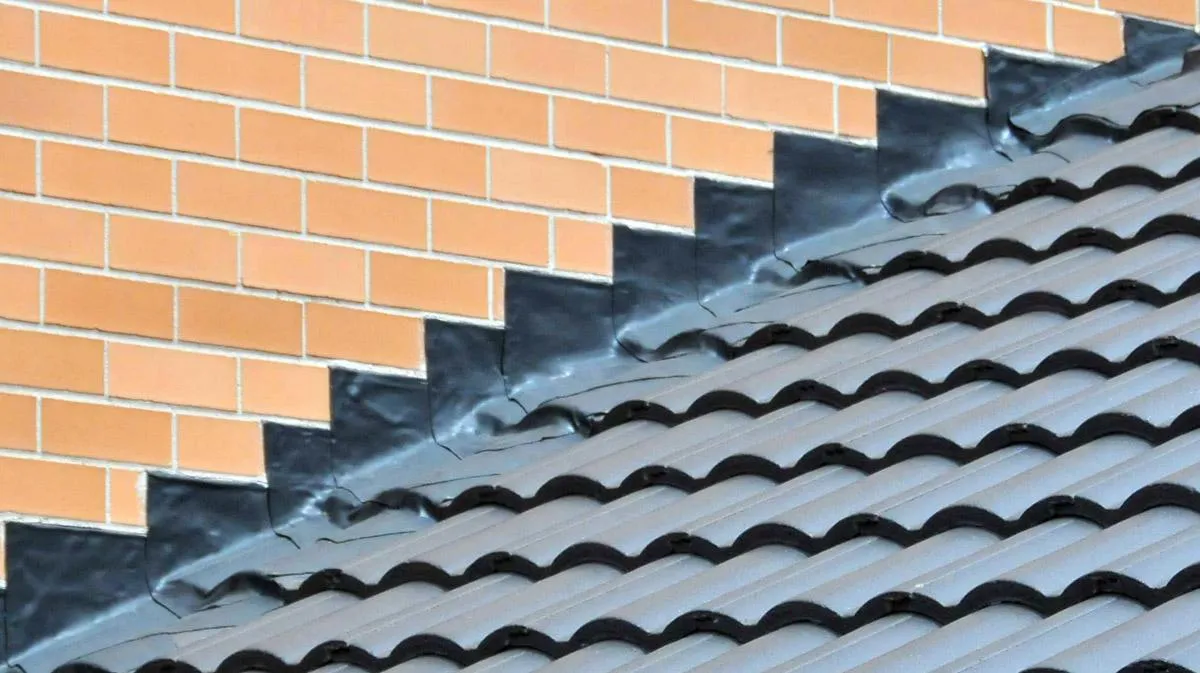
Common Types of Flashing
Understanding the main types of flashing helps you know how your roof stays protected from water damage. Drip edge flashing is installed at roof edges to direct water away from your home, preventing pooling and potential leaks. Step flashing is another key type, often used where your roof meets a wall. This special flashing ensures that water flows away from the joint, reducing the likelihood of water seepage. Valley flashing goes in roof valleys to guide water down the slope and prevent buildup. Each flashing type plays a crucial role in keeping your roofing system watertight.
Installation Techniques for Flashing
Proper flashing installation requires careful techniques and close attention to detail to ensure effective water protection. When putting in flashing, you must create a watertight seal at all joints and connections. Start by measuring and cutting the flashing material to fit the exact area, leaving room for proper overlap and coverage. Use matching fasteners, such as nails or screws, to hold the flashing in place, ensuring they are inserted straight and tight without being too tight. Connect the flashing properly with roofing material using approved sealants to prevent gaps or leak spots. Always follow the manufacturer's instructions and industry best practices for a long-lasting and effective flashing installation.
Signs of Flashing Issues
Spotting flashing problems early requires watching for small signs that may indicate water is entering or structural damage is beginning to occur. Check for rust or corrosion on metal flashings, which show moisture exposure. Loose or missing flashing pieces can let water leak into your roof system, causing problems. Worn-out sealant around flashing joints is another warning sign, as it hurts the waterproofing ability of the flashing. Stains on ceilings or walls can indicate that water is getting through faulty flashing. Watch for visible gaps between flashing and roof materials, as these gaps can allow water to enter. Regularly flashing checks for these signs can help prevent more significant damage later.
Maintenance Tips for Flashing
Regularly scheduled flashing inspection and maintenance to keep it working properly and prevent water damage. Begin by inspecting the flashing for signs of damage, including rust, corrosion, or gaps. Make sure the flashing is firmly attached to the roof with no loose or missing pieces. Clean the flashing often to stop debris buildup, which can block water and cause leaks. Also, reseal areas where flashing meets other materials, such as chimneys or vents, to maintain a watertight seal. Perform these maintenance tasks at least twice a year, preferably in spring and fall, to extend the life of your roof flashing and protect your home from water intrusion.
Related Topics:
Our Team

John Doe

John Doe

John Doe

John Doe
Office:
North Carolina
Call:
(704) 769-2468
Email:


