
How to Remove Moss From Roof: A Step-By-Step Guide
Moss buildup on rooftops is a common issue that many homeowners encounter, particularly in areas with high humidity and limited sunlight. This guide walks you through the complete process of safely and effectively removing moss from your roof. The best roofers recommend following these proven methods to protect your roof and maintain its appearance. We'll cover how to identify the moss problem, gather the necessary tools, apply cleaning solutions, scrub and rinse properly, and prevent moss from returning.
Assessing the Moss Infestation
Start by carefully inspecting your entire roof to determine the extent of moss growth. Moss grows best in damp, shaded spots, so look closely at areas that receive little sunlight and where water may collect. Check for patches of green growth or small plants on the shingles or in roof cracks. Notice any spots where the moss looks especially thick or covers large areas, as these places will need more work to clean. By examining the entire roof carefully, you can assess the severity of the moss problem and develop a plan to remove it effectively.
Gathering the Necessary Tools
Before starting the moss removal work, gather all the necessary tools for the job. You'll need a sturdy ladder to reach the roof safely, a garden hose with a spray attachment for washing, a stiff brush or broom to scrub off the moss, and a plastic sheet to catch debris and protect the surrounding area. Don't forget to wear safety gear, such as gloves, safety glasses, and shoes with a good grip to prevent accidents. Having all these tools ready before you start will make the moss removal job go more smoothly and help you get better results.
Applying Moss Removal Solution
Begin the moss removal process by applying a specialized moss-killing solution to the affected areas. Ensure the roof is dry before applying the solution, allowing it to soak in properly. Begin at the top of the roof and work down, spraying the moss removal solution evenly to cover all problem areas completely. Follow the instructions on the product label for mixing instructions and safety precautions. Let the solution sit on the roof for the time recommended on the package, allowing it to kill the moss effectively. This step is important for successful moss removal.
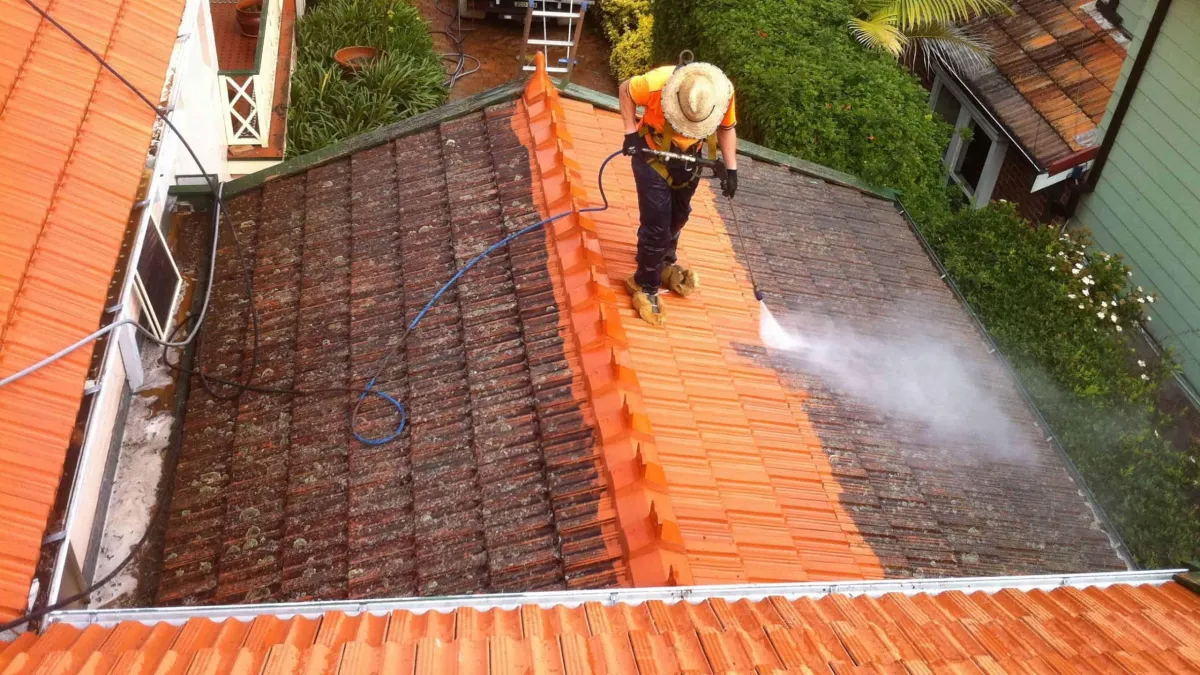
Scrubbing and Rinsing the Roof
After the solution has done its job, gently scrub the roof to remove the dead moss and any leftover debris, then rinse everything clean. Use a soft brush or a low-pressure power washer, starting from the top and working your way down. Be careful not to scrub too hard, as this could damage the roof shingles. Pay extra attention to areas where moss was thickest, making sure to clear away all pieces. After scrubbing, rinse the roof thoroughly with water, paying close attention to the corners and edges. A clean roof without moss will look better and prevent damage that moss buildup can cause.
Preventing Future Moss Growth
Taking steps to prevent moss from growing back is crucial for maintaining a clean roof over the long term. Consider placing zinc or copper strips along the roof ridge; when it rains, these metals release substances that prevent moss from growing. Cut back tree branches that hang over your roof to let in more sunlight and reduce moisture. Keep your roof well-ventilated to control temperature and humidity levels, making it harder for moss to grow. Clean your gutters regularly and remove debris to prevent water from pooling, where moss is likely to grow. You can also apply treatments that resist moss for long-lasting protection. These prevention steps will help keep your roof moss-free for years to come.
Related Topics:
Our Team

John Doe

John Doe

John Doe

John Doe
Office:
North Carolina
Call:
(704) 769-2468
Email:


